...
| No Format |
|---|
This example uses the PostgreSQL org.postgresql.Driver database driver. To use this driver, its containing .jar file must be copied to the extension .../lib/ directory (see JMeter's Classpath for more details). Otherwise, expect a substantial amount of stack traces when running this test plan. |
| Anchor | ||||
|---|---|---|---|---|
|
Adding Users
The first step you want to do with every JMeter Test Plan is to add a Thread Group element. The Thread Group tells JMeter the number of users you want to simulate, how often the users should send requests, and the how many requests they should send.
...
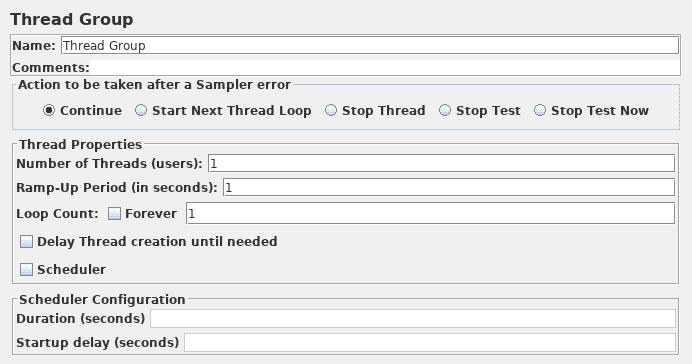
Next, you need to modify the default properties. Select the Thread Group element in the tree, if you have not already selected it. You should now see the Thread Group Control Panel in the right section of the JMeter window (see Figure 7.1 below)
http://jakarta.apache.org/jmeter/images/screenshots/webtest/threadgroup.png BR
Figure 7.1. Thread Group with Default Values
...
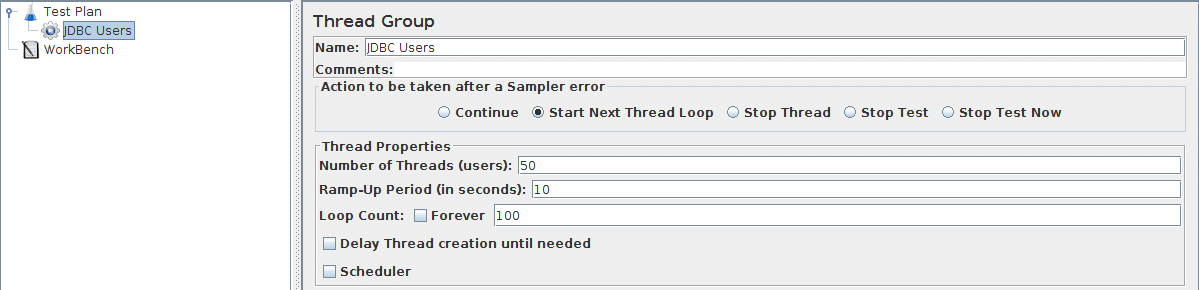
See Figure 7.2 for the completed JDBC Users Thread Group.
http://jakarta.apache.org/jmeter/images/screenshots/jdbctest/threadgroup2.png BR
Figure 7.2. JDBC Users Thread Group
| Anchor | ||||
|---|---|---|---|---|
|
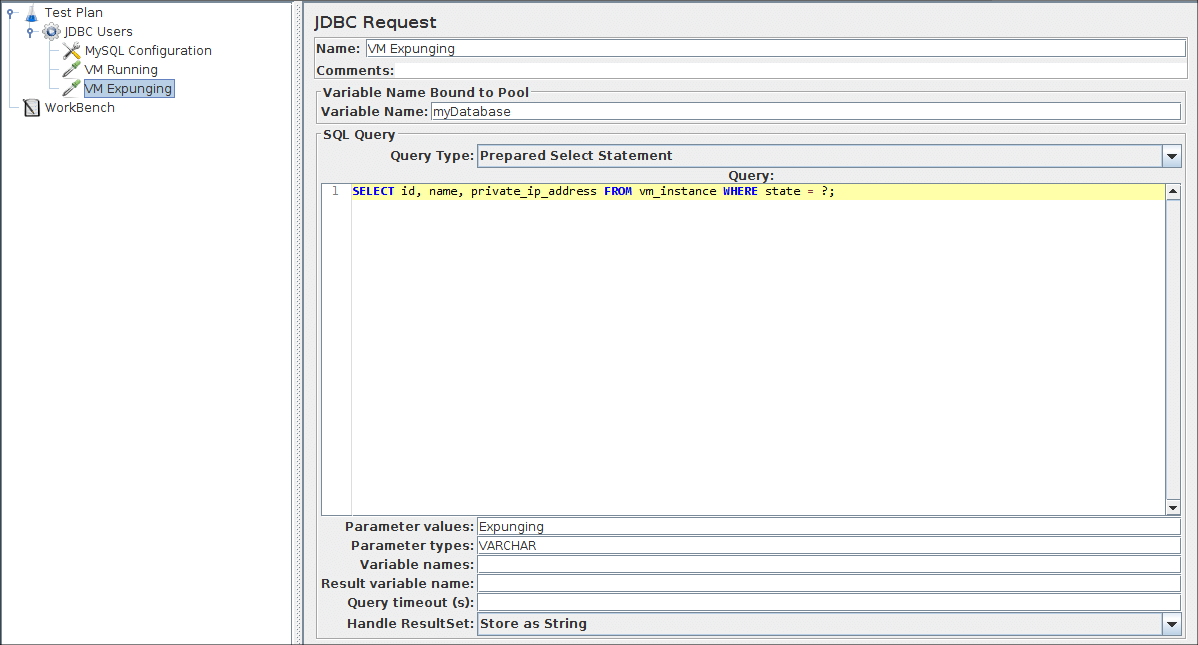
Adding JDBC Requests
Now that we have defined our users, it is time to define the tasks that they will be performing. In this section, you will specify the JDBC requests to perform.
...
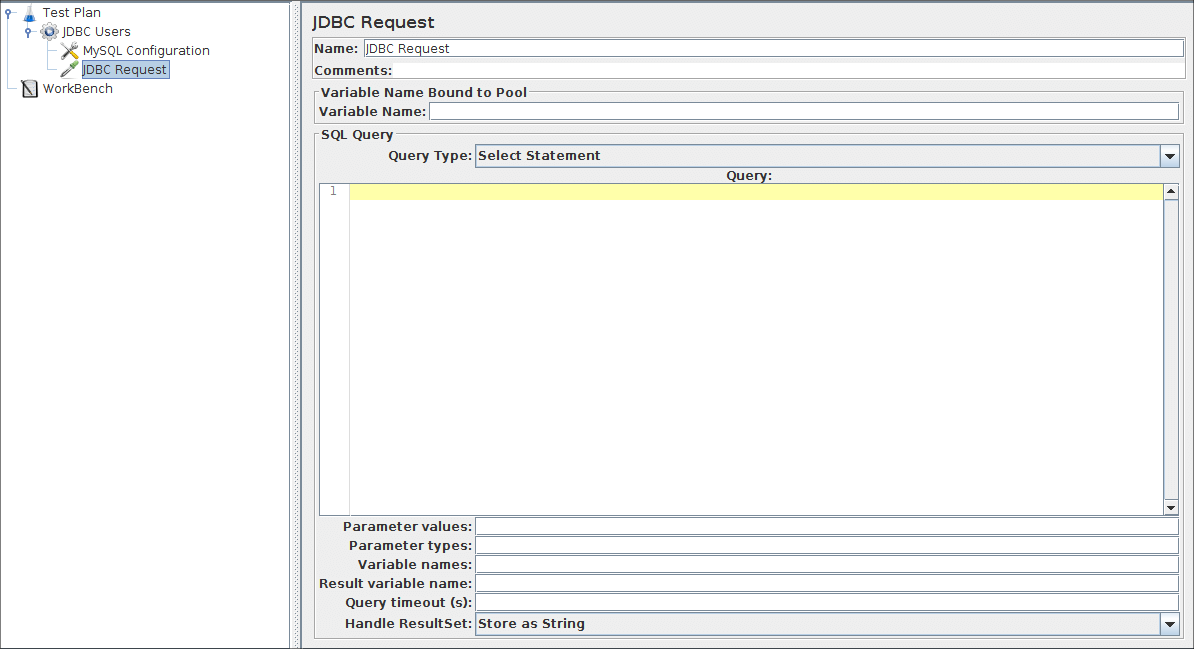
Begin by selecting the JDBC Users element. Click your right mouse button to get the Add menu, and then select Add --> Sampler --> JDBC Request. Then, select this new element to view its Control Panel (see Figure 7.3).
http://jakarta.apache.org/jmeter/images/screenshots/jdbctest/JDBCRequest.png BR
Figure 7.3. JDBC Request
In our Test Plan, we will make two JDBC requests. The first one is for Eastman Kodak stock, and the second is Pfizer stock (obviously you should change these to examples appropriate for your particular database). These are illustrated below.
...
- Change the Name to "Kodak".
- Enter the JDBC URL field.
- Enter the Driver Class field.
- Change the Number of Connections in Pool field to "1".
- Change the Max. Usage For Each Connection field to "1".
- Enter the Username field.
- Enter the Password field.
- Enter the SQL Query String field.
http://jakarta.apache.org/jmeter/images/screenshots/jdbctest/JDBCRequest2.pngBR
Figure 7.4. JDBC Request for Eastman Kodak stock
...
- Change the Name to "Pfizer".
- Enter the JDBC URL field.
- Enter the Driver Class field.
- Change the Number of Connections in Pool field to "1".
- Change the Max. Usage For Each Connection field to "1".
- Enter the Username field.
- Enter the Password field.
- Enter the SQL Query String field.
http://jakarta.apache.org/jmeter/images/screenshots/jdbctest/JDBCRequest3.pngBR
Figure 7.6. JDBC Request for Pfizer stock
| Anchor | ||||
|---|---|---|---|---|
|
Adding a Listener to View/Store the Test Results
...
Select the JDBC Users element and add a Graph Results listener (Add --> Listener --> Graph Results).
http://jakarta.apache.org/jmeter/images/screenshots/jdbctest/graph-results.png BR
Figure 7.6. Graph results Listener
| Anchor | ||||
|---|---|---|---|---|
|
Saving the Test Plan
Although it is not required, we recommend that you save the Test Plan to a file before running it. To save the Test Plan, select Save Test Plan from the File menu (with the latest release, it is no longer necessary to select the Test Plan element first).
JMeter allows you to save the entire Test Plan tree or only a portion of it. To save only the elements located in a particular "branch" of the Test Plan tree, select the Test Plan element in the tree from which to start the "branch", and then click your right mouse button to access the Save As menu item. Alternatively, select the appropriate Test Plan element and then select Save As from the Edit menu.
| Anchor | ||||
|---|---|---|---|---|
|
Running the Test Plan
From the Run menu, select Run.
...