Building a WebService Test Plan
Wiki Markup
| Anchor | ||||
|---|---|---|---|---|
|
Adding Users
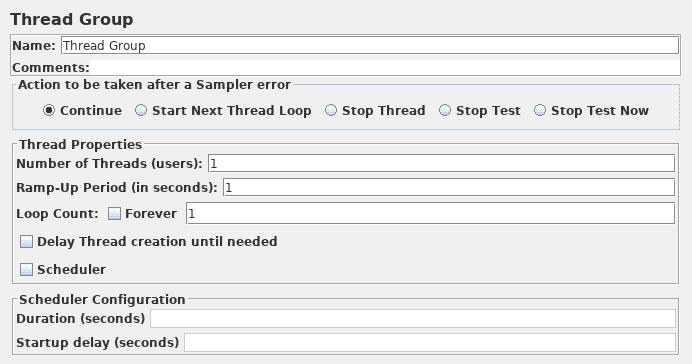
The first step you want to do with every JMeter Test Plan is to add a Thread Group element. The Thread Group tells JMeter the number of users you want to simulate, how often the users should send requests, and the how many requests they should send.
...
Next, you need to modify the default properties. Select the Thread Group element in the tree, if you have not already selected it. You should now see the Thread Group Control Panel in the right section of the JMeter window (see Figure 10.1 below)
http://jakarta.apache.org/jmeter/images/screenshots/webtest/threadgroup.png BR
Figure 10.1. Thread Group with Default Values
...
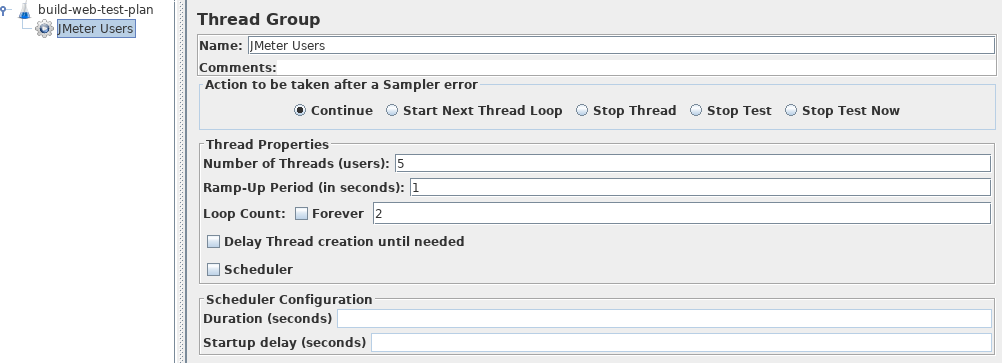
See Figure 10.2 for the completed Jakarta Users Thread Group.
http://jakarta.apache.org/jmeter/images/screenshots/webtest/threadgroup2.png BR
Figure 10.2. Jakarta Users Thread Group
| Anchor | ||||
|---|---|---|---|---|
|
Adding WebService Requests
In our Test Plan, we will use a .NET webservice. Since you're using the webservice sampler, we won't go into the details of writing a webservice. If you don't know how to write a webservice, google for webservice and familiarize yourself with writing webservices for Java and .NET. It should be noted there is a significant difference between how .NET and Java implement webservices. .NET webservices are document centric, whereas Java webservices tend to be RPC centric. Neither approach is perfect and each has limitations.
...
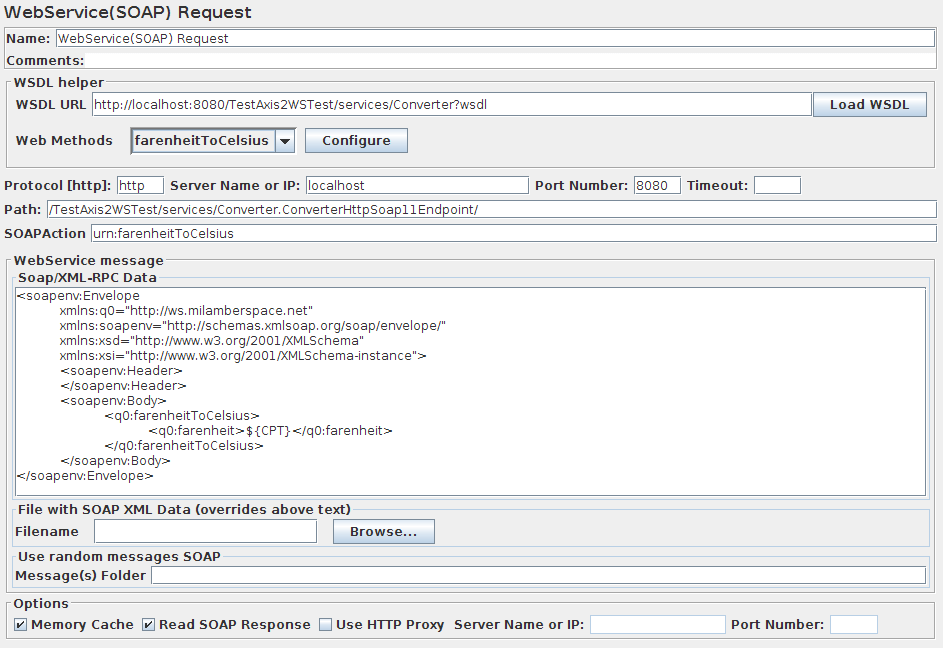
Start by adding the sampler WebService(SOAP) Request (Beta Code) to the Jakarta Users element (Add --> Sampler --> WebService(SOAP) Request (Beta Code) ). Then, select the webservice Request element in the tree and edit the following properties (see Figure 10.5).
Wiki Markup - Enter the WSDL URL and click "Load WSDL"
http://jakarta.apache.org/jmeter/images/screenshots/webservice_sampler.pngBR
Figure 10.3. Webservice Request
...
An important note on the sampler. It will automatically use the proxy host and port passed to JMeter from command line, if thoe fields in the sampler are left blank. If a sampler has values in the proxy host and port text field, it will use the ones provided by the user. If no host or port are provided and JMeter wasn't started with command line options, the sampler will fail silently. This behavior may not be what users expect.
| Anchor | ||||
|---|---|---|---|---|
|
Adding a Listener to View Store the Test Results
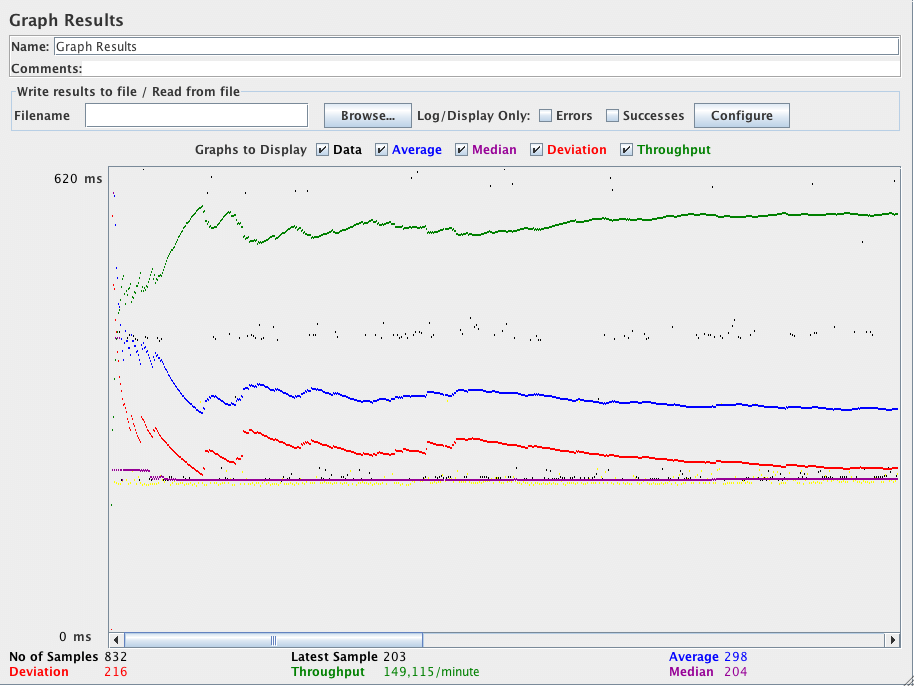
The final element you need to add to your Test Plan is a Listener . This element is responsible for storing all of the results of your HTTP requests in a file and presenting a visual model of the data.unmigrated-wiki-markup
Select the Jakarta Users element and add a Graph Results listener (Add -\-> Listener -\-> \ [ :Graph Results|UserManual / Reference/GraphListener: Graph Results\]). Next, you need to specify a directory and filename of the output file. You can either type it into the filename field, or select the Browse button and browse to a directory and then enter a filename.
http://jakarta.apache.org/jmeter/images/screenshots/graph_results.png BR
Figure 10.7. Graph Results Listener
| Anchor | ||||
|---|---|---|---|---|
|
Saving the Test Plan
Although it is not required, we recommend that you save the Test Plan to a file before running it. To save the Test Plan, select Save Test Plan from the File menu (with the latest release, it is no longer necessary to select the Test Plan element first).
| No Format |
|---|
JMeter allows you to save the entire Test Plan tree or only a portion of it. To save only the elements located in a particular "branch" of the Test Plan tree, select the Test Plan element in the tree from which to start the "branch", and then click your right mouse button to access the Save As menu item. Alternatively, select the appropriate Test Plan element and then select Save As from the Edit menu. |
| Anchor | ||||
|---|---|---|---|---|
|
Running the Test Plan
From the Run menu, select Run.
...