Running Nutch in Eclipse
Thia document provides instructions for setting up a development environment for Nutch within the Eclipse IDE. It is intended to provide a comprehensive beginning resource for the configuration, building, crawling and debugging of Nutch master branch in the above context.
N.B. Nutch 2.x branch is no longer in development so all documentation relating to that branch has been removed from this guide. If you are interested in that information then contact the Nutch dev@ team.
Before you start
Setting up Nutch to run in Eclipse can be tricky, and most of the time you are much faster if you edit Nutch in Eclipse but run the scripts from the command line. However, it's very useful to be able to debug Nutch in Eclipse and is also extremely useful when applying and testing patches/pull requests as it enables you to see them working in a larger context. This being said, you will still benefit greatly by looking at the hadoop.log output. This tutorial covers a fully internal Eclipse/Nutch set up, using only Eclipse tools and associated plugins.
Prerequisites
- You need to have Apache Ant installed and configured on your system.
- Grab the newest version of Eclipse available here.
- All of the following should be available from the Eclipse Marketplace. However if not, you can download them throughout Eclipse as follows
Steps
Clone and Build Nutch
Get the latest source code using Git from the terminal. For Nutch 1.x (i.e. master branch) run this:
 git clone https://github.com/apache/nutch.git
 cd nutch
2. Add http.agent.name and http.robots.agents with appropriate values in conf/nutch-site.xml. See conf/nutch-default.xml for the description of these properties. Also, add plugin.folders and set it to {PATH_TO_NUTCH_CHECKOUT}/build/plugins e.g. If Nutch is present at /home/tejas/Desktop/nutch, set the property to:<property> <name>plugin.folders</name> <value>/home/tejas/Desktop/nutch/build/plugins</value> </property>
3. Run this command:ant eclipse
Load project in Eclipse
###http://imageshack.us/a/img855/9242/importproject.png}}
- In Eclipse, click on “File” -> “Import...”
2. Select “Existing Projects into Workspace”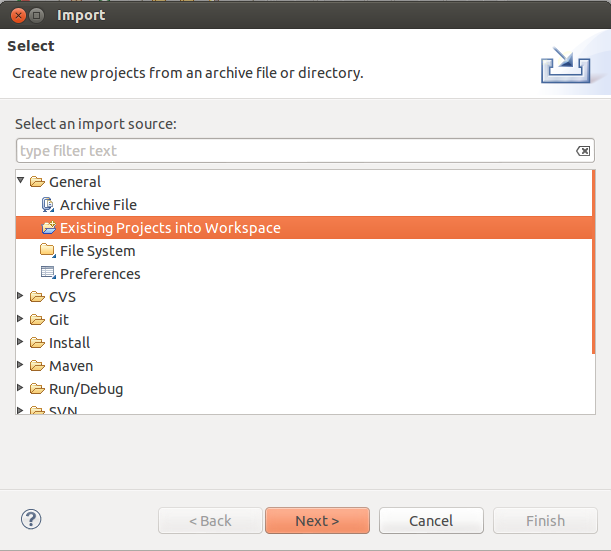
3. In the next window, set the root directory to the location where you cloned Nutch master branch. Click “Finish”.
4. You will now see a new project named nutch being added in the workspace. Wait for a moment until Eclipse refreshes its cache and builds its workspace. You can see the status at the bottom right corner of Eclipse.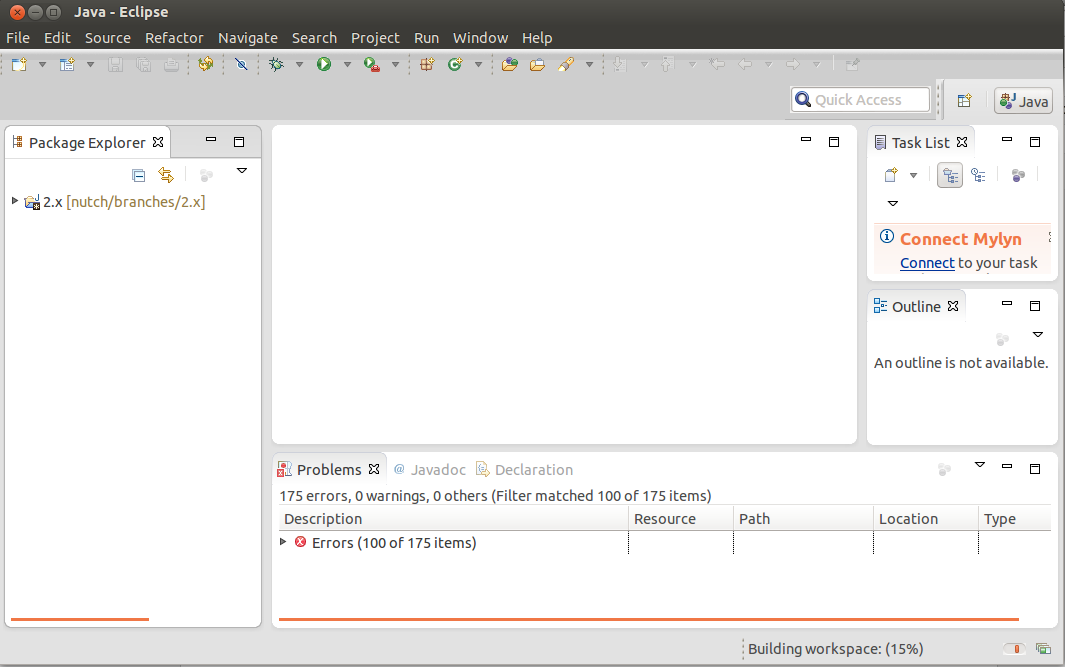
5. In Package Explorer, right click on the project nutch, select “Build Path” -> “Configure Build Path”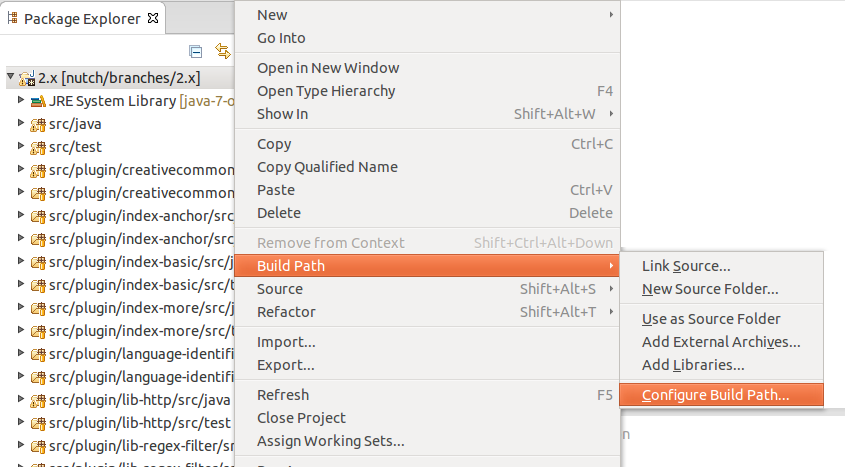
6. In the “Order and Export” tab, scroll down and select nutch/conf. Click on “Top” button. Sadly, Eclipse will again build the workspace but this time it won’t take take much.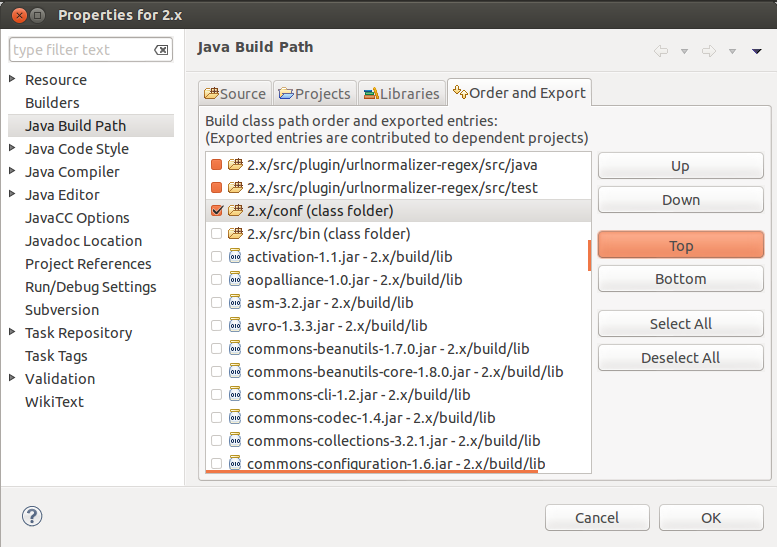
Create Eclipse launcher
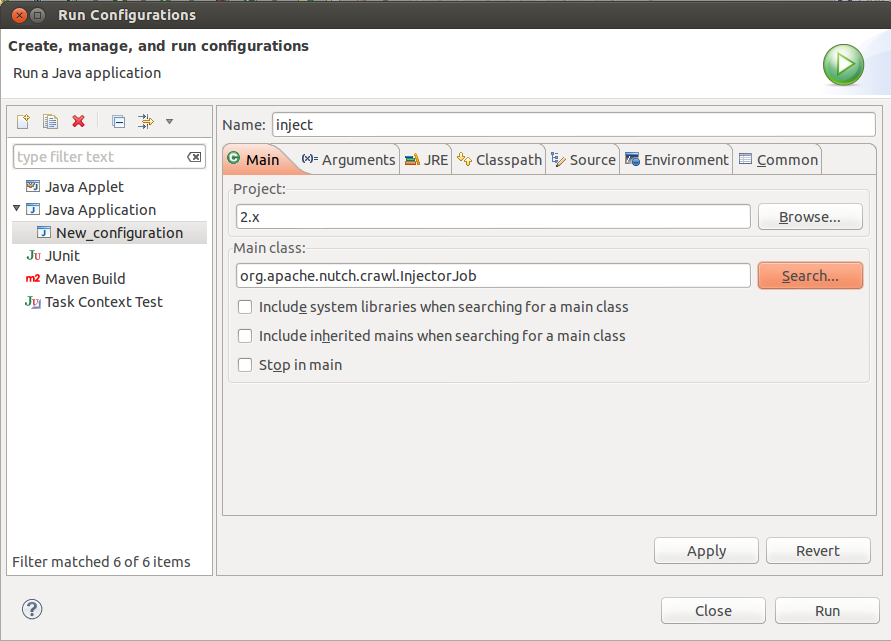
Now, lets get geared to run something. Lets start off with the inject operation. Right click on the project in “Package Explorer” -> select “Run As” -> select “Run Configurations”. Create a new configuration. Name it "inject".
- Set the main class as: org.apache.nutch.crawl.Injector
In the arguments tab, for program arguments, provide two Program arguments
- the path of the crawldb you wish to create i.e. /home/tejas/Desktop/nutch/crawldb, and
- the path of a directory containing seed urls i.e. /home/tejas/Desktop/nutch/urls
Additionally, you should set VM Arguments to “-Dhadoop.log.dir=logs -Dhadoop.log.file=hadoop.log”
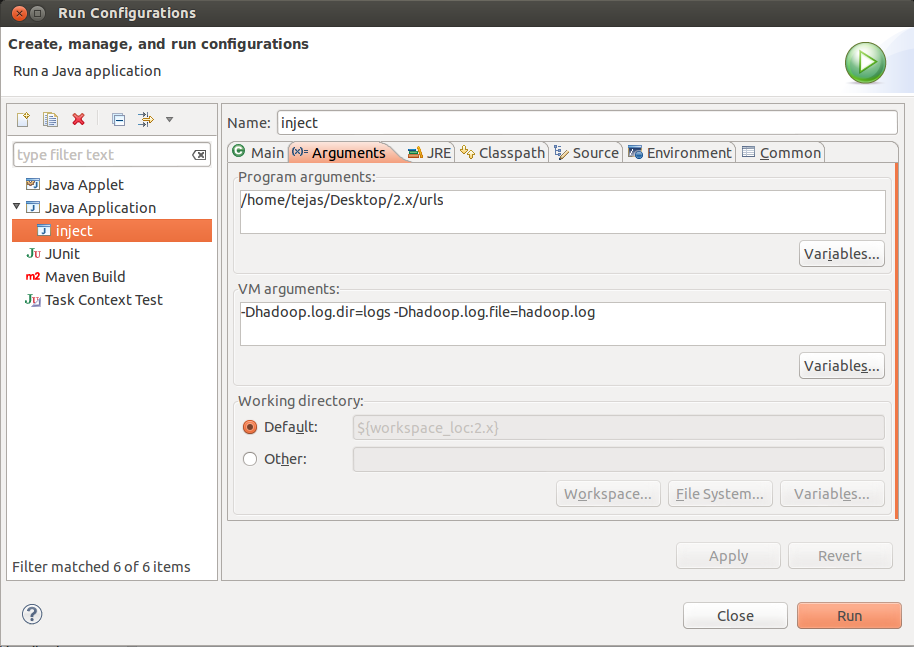
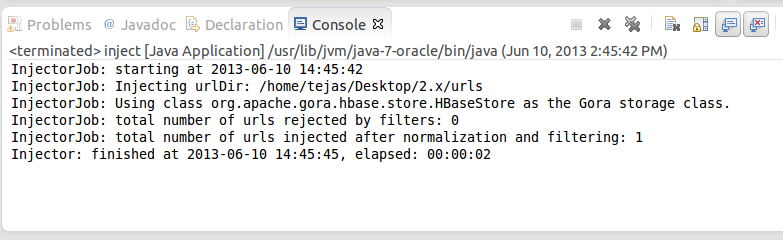
Click "Apply" and then click "Run". If everything was set perfectly, then you should see inject operation progressing on console.
If you want to find out the java class corresponding to any command, just peek inside "src/bin/nutch" script and at the bottom you would find a switch case with a case corresponding to each command. Here are the important classes corresponding to the crawl cycle:
Operation | Class in Nutch 1.x (i.e.trunk) |
inject | org.apache.nutch.crawl.Injector |
generate | org.apache.nutch.crawl.Generator |
fetch | org.apache.nutch.fetcher.Fetcher |
parse | org.apache.nutch.parse.ParseSegment |
updatedb | org.apache.nutch.crawl.CrawlDb |
Debug Nutch in Eclipse
- Set breakpoints and debug a crawl
- It can be tricky to find out where to set the breakpoint, because of the Hadoop jobs.
- Here are a few good places to set breakpoints in the 1.x codebase:
Fetcher [line: 1115] - run
Fetcher [line: 530] - fetch
Fetcher$FetcherThread [line: 560] - run()
Generator [line: 443] - generate
Generator$Selector [line: 108] - map
OutlinkExtractor [line: 71 & 74] - getOutlinks
Remote Debugging in Eclipse
- create a new Debug Configuration as Remote Java Application and remember the port (here: 37649)
- launch nutch from command-line but add options to use the Java Debugger JDWP Agent Library, e.g. from bash:
% export NUTCH_OPTS="-agentlib:jdwp=transport=dt_socket,server=y,suspend=y,address=localhost:37649"
% $NUTCH_HOME/bin/nutch parsechecker http://myurl.com/
3. the application will be suspended just after launch
4. now go to Eclipse, set appropriate break-points, and run the previously created Debug Configuration
Instead of creating an extra launch configuration for every tool you want to debug, one single configuration is enough to debug any tool (parsechecker, indexchecher, URL filter, etc.) and that even remotely (crawler/tool running on server, Eclipse debugger locally).
Debugging and Timeouts
Debugging takes time, esp. when inspecting variables, stack traces, etc. Usually too much time, so that some timeout will apply and stop the application. Set timeouts in the nutch-site.xml used for debugging to a rather high value (or -1 for unlimited), e.g., when debugging the parser:
<property>
  <name>parser.timeout</name>
  <value>-1</value>
</property>
Display Javadoc for Dependent Libraries
Eclipse is able to show Javadocs immediately, not only for Nutch classes but also for dependent libraries. While Eclipse takes the Javadocs of Nutch classes directly from the source files, this is not the case for dependent Ivy managed libraries. There are two ways to tell Eclipse where to find the Javadocs of dependent libs: (1) adding the Javadoc URL to a jar file, or (2) use the IvyDE Eclipse plugin. Note that both ways will modify the file .classpath. Because the ant eclipse target will overwrite the .classpath file, you should make a backup before and merge the changes made via Eclipse back afterwards.
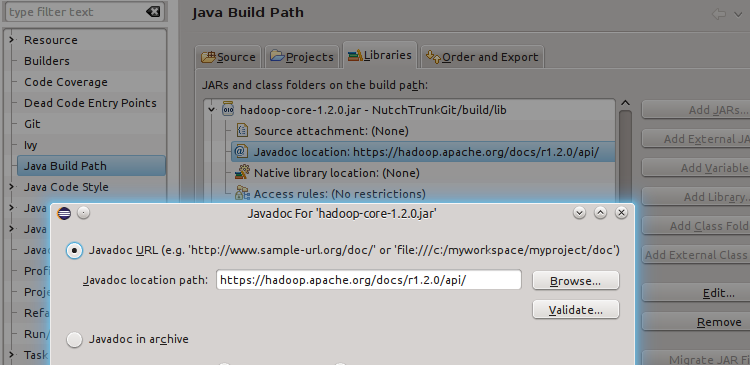
Connect a Library to the Javadoc URL
The simplest way to connect a jar library with its Javadocs is to add the Javadoc URL manually in the classpath editor, see screenshot.
IvyDE
The Nutch build system delegates the managment of library dependencies to Apache Ivy. There is an Eclipse plugin IvyDE to integrate Ivy's dependency managment. It is well-documented, including a description how to add the managed libraries to the Eclipse project. The main Ivy file is ivy/ivy.xml but note that every plugin has its own ivy.xml. If working on a specific plugin, it is a good idea to add also its ivy.xml. It is possible to use IvyDE in addition to the libraries placed by ant eclipse in .classpath.
The repository hosting a library often also provides packages containing javadoc and sources. E.g., the JUnit repository https://repo1.maven.org/maven2/junit/junit/4.11/ provides the following files:
junit-4.11-javadoc.jar                             14-Nov-2012 19:21              379344
junit-4.11-sources.jar                             14-Nov-2012 19:21              151329
junit-4.11.jar                                     14-Nov-2012 19:21              245039
junit-4.11.pom                                     14-Nov-2012 19:21                2344
IvyDE is then able to fetch also javadoc and source packages (if provided) and show them in Eclipse. Again, there is an excellent description, how this can be enabled in the Source/Javadoc Mapping section of the Ivy preferences. Note that the Ivy cache (usually ~/.ivy/cache/) must be cleaned before Ivy Resolve is called from Eclipse.
Troubleshooting
eclipse: Cannot create project content in workspace
The Nutch source code must be out of the workspace folder. Alternatively you can download the code with eclipse (svn) under your workspace rather than try to create the project using existing code, eclipse sometimes doesn't let you do it from source code into the workspace.
Plugin directory not found
Make sure you set your plugin.folders property correct, instead of using a relative path you can use a absolute one as well in nutch-default.xml or even better in nutch-site.xml. Ideally all efforts should be made to keep nutch-default.xml completely intact.
<property>
  <name>plugin.folders</name>
  <value>/home/....../trunk/src/plugin</value>
No plugins loaded during unit tests in Eclipse
During unit testing, Eclipse ignored conf/nutch-site.xml in favor of src/test/nutch-site.xml, so you might need to add the plugin directory configuration to that file as well.
Debugging Hadoop classes
Sometimes (fairly often) it makes sense to also have the Hadoop classes available during debugging. This should really second nature as Nutch heavily relies upon the underlying Hadoop infrastructure. Therefore you can check out the Hadoop sources into your Eclipse IDE and combine to debug this way. You can:
- Checkout the Hadoop version that should be used within Nutch master branch. You can determine this version by checking ivy.xml.
- Configure a Hadoop project similar to the Nutch project within your Eclipse IDE. See this.
- Add the Hadoop project as a dependent project of Nutch project
- You can now also set break points within Hadoop classes like inputformat implementations etc.