Intro
Solr can be run on Amazon's EC2.
Instructions
![]() :TODO:
:TODO: ![]() This page is a work in progress that will reflect how to run Solr 4.3 on AWS EC2 with screenshots when I am done. -MDB
This page is a work in progress that will reflect how to run Solr 4.3 on AWS EC2 with screenshots when I am done. -MDB
Create an Instance
- Create an Amazon Web Services account. Amazon offers a free usage tier if you're just trying it out for the first time. 2. Follow the Getting Started with Amazon EC2 Linux Instances guide to become familiar with EC2 instances, security groups, instance keys, and EBS volumes. 3. Create a security group for Solr servers. It should allow access to ports 22 and 8983 for the IP you're working from, with routing prefix /32 (e.g., 4.2.2.1/32). This will limit access to your current machine. If you want wider access to the instance available to collaborate with others, you can specify that, but make sure you only allow as much access as needed. A Solr instance should not be exposed to general Internet traffic. If you need help figuring out what your IP is, you can always use whatismyip.com. Please note that production security on AWS is a wide ranging topic and is beyond the scope of this tutorial. 4. Create instance
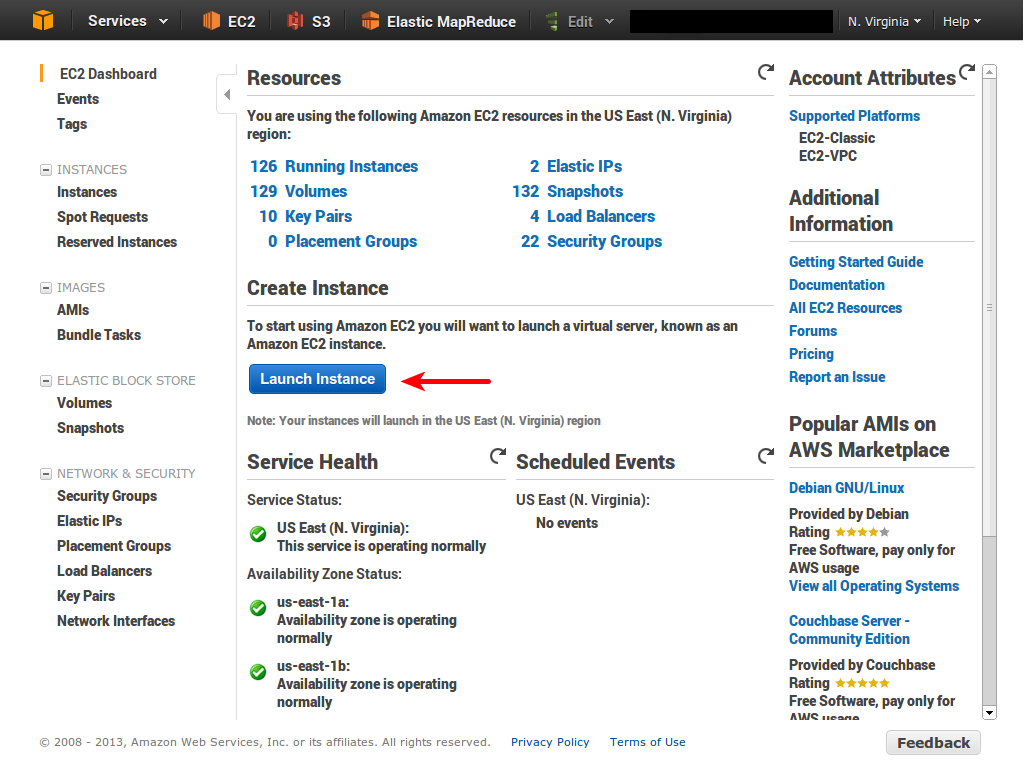
- Click on Launch instance in the EC2 section of the AWS console.
1-launch-instance.png]]
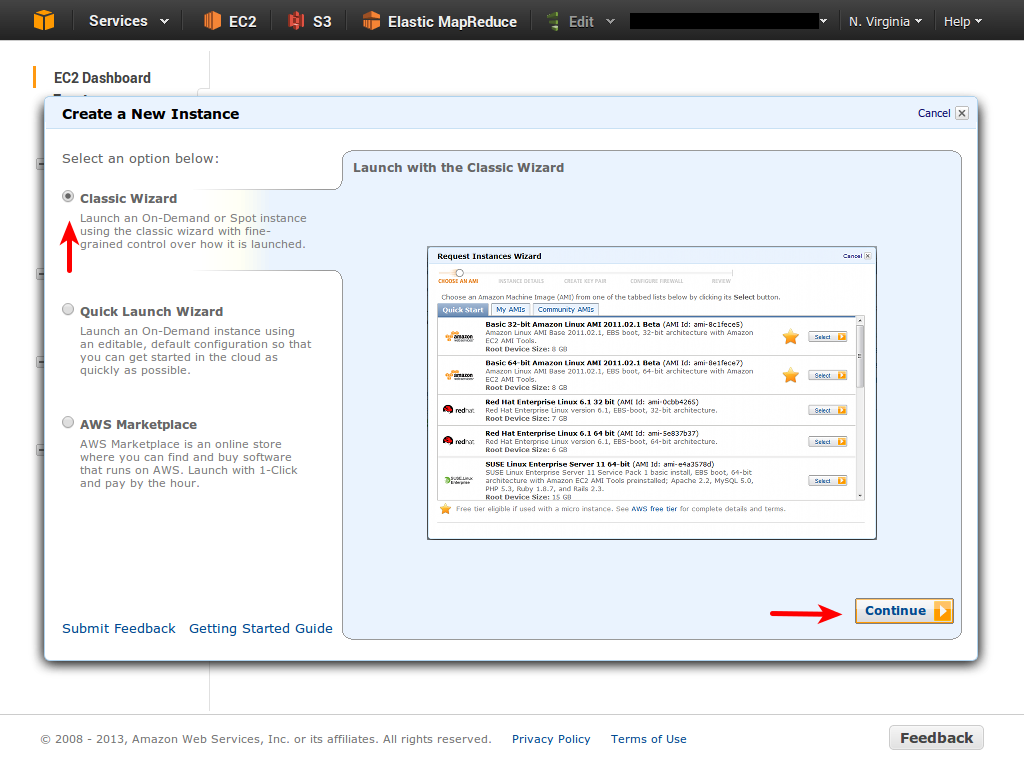
b. Choose "Classic Wizard". 2-classic-wizard.png]]
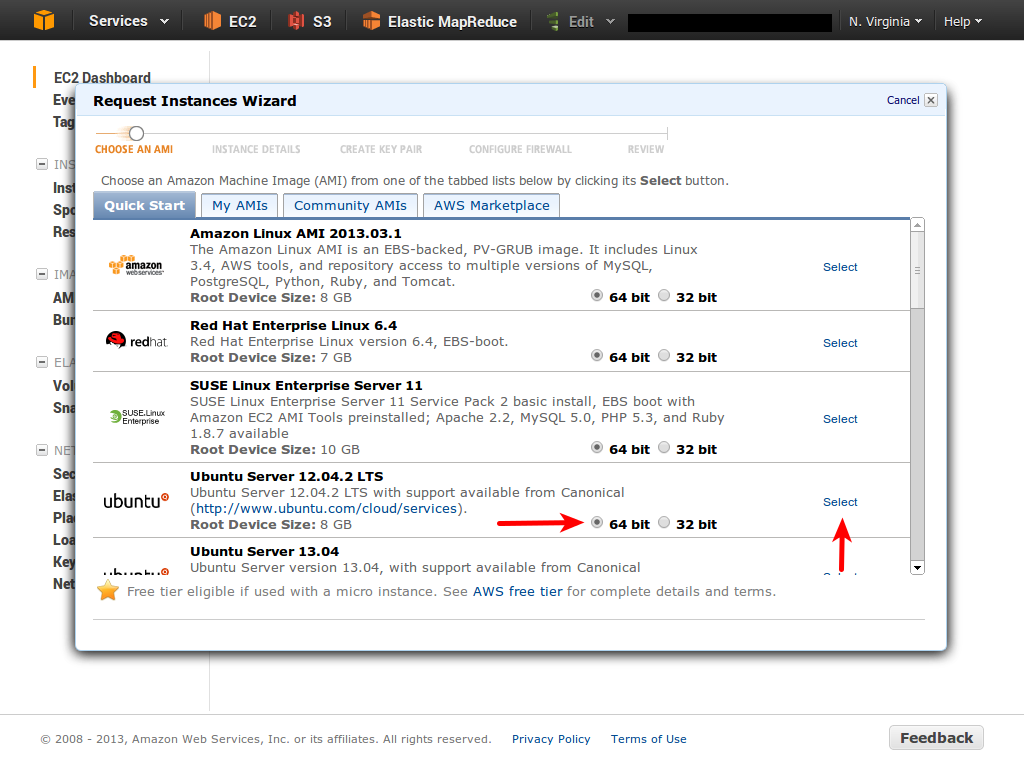
c. For this demo, we're going to use the 64-bit version of Ubuntu 12.04.2. 3-choose-ami.png]]
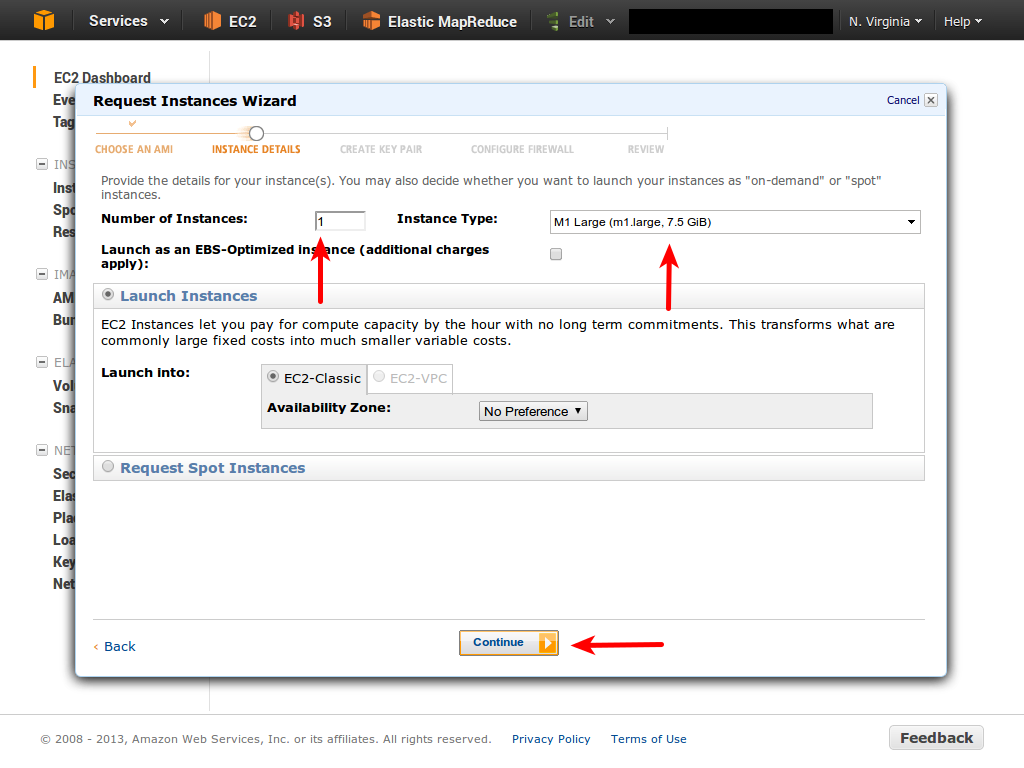
d. We're using an m1.large instance for this example. For production use, you're likely going to have to go through an exercise to find the right instance size that matches your content and usage patterns. An m1.large is definitely big enough for this demo, however. 4-instance-type.png]]
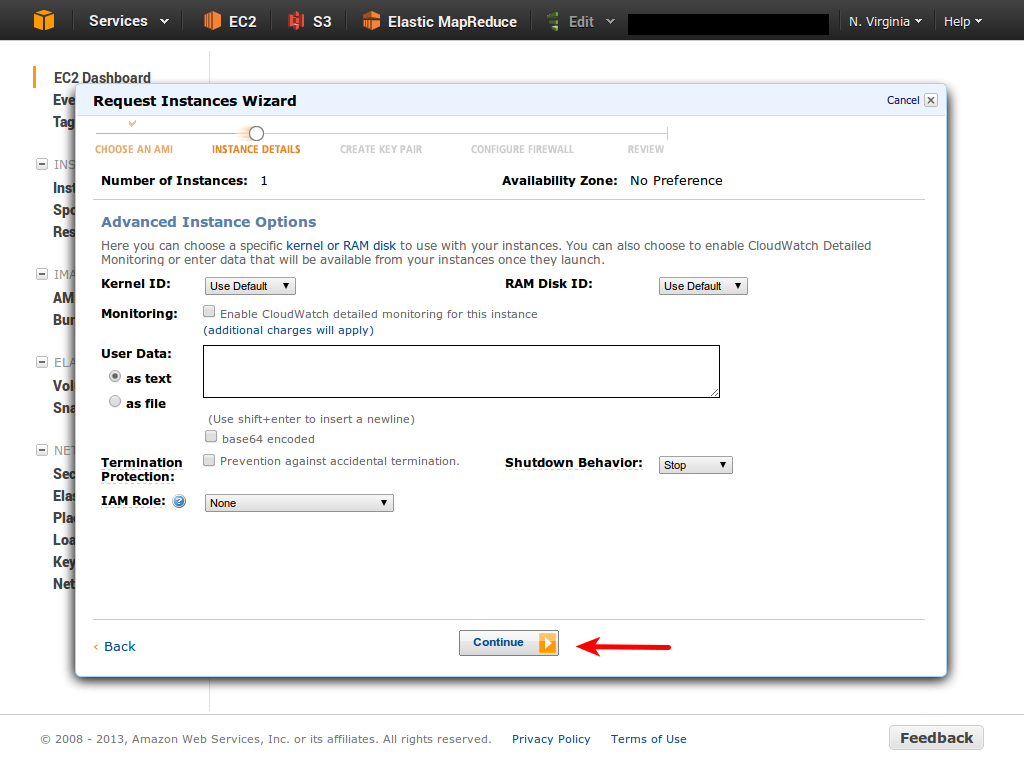
e. You don't need to make any changes on the Advanced Options screen. 5-advanced-options.png]]
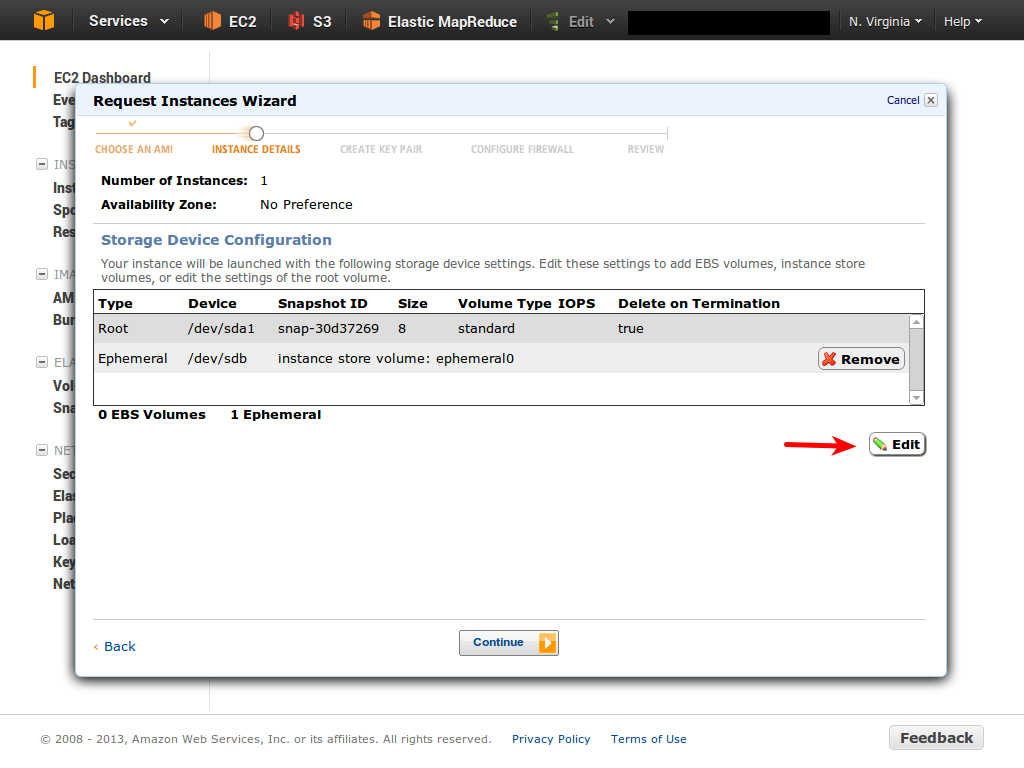
f. We are going to need to make some changes to the storage configuration, however. Click edit. 6-edit-storage.png]]
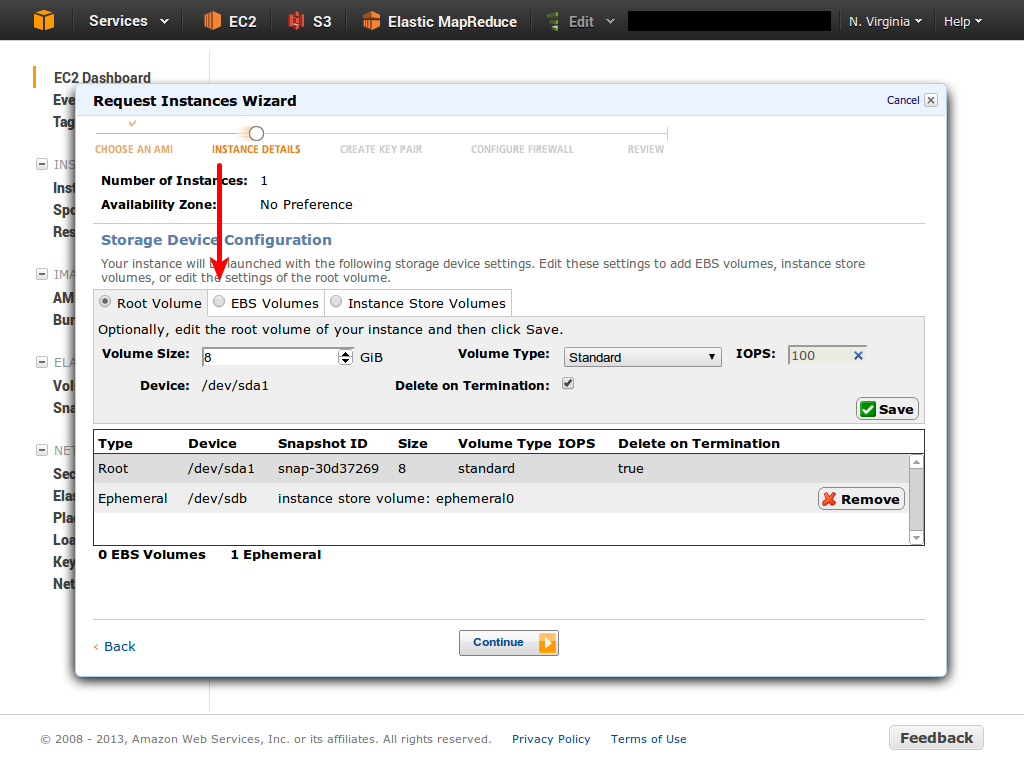
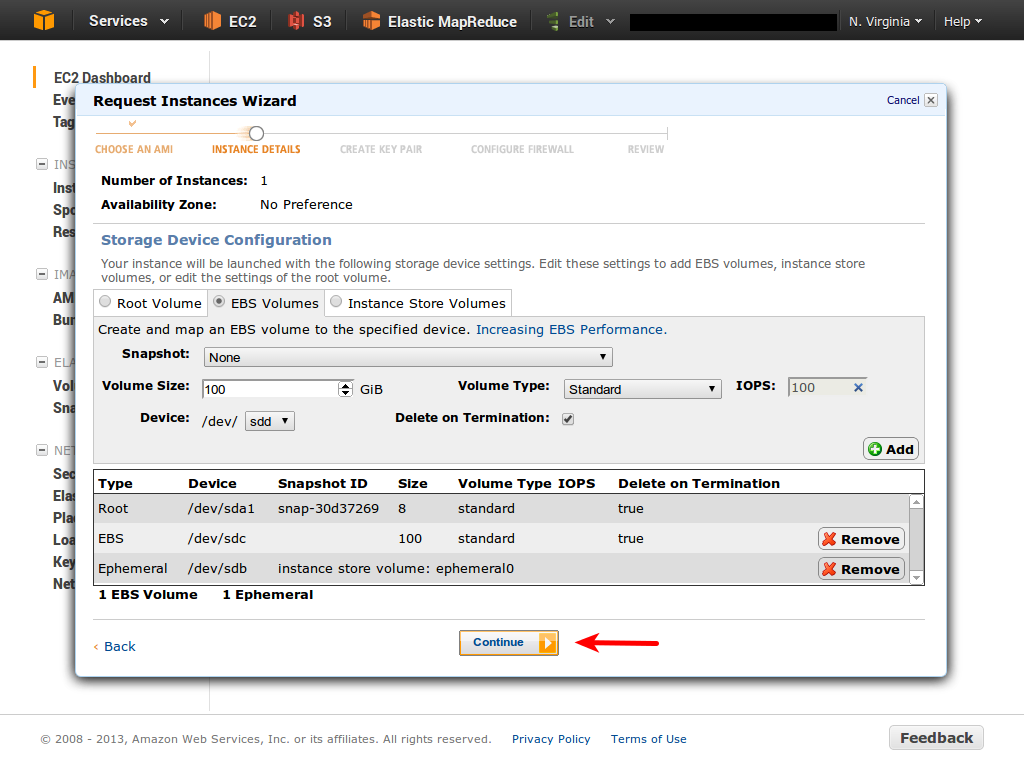
g. The root volume is fine for this exercises, but we're going to create a separate EBS volume to store our Solr install and data. By storing this on a seperate volume, we can easily recover from a failed instance or decide to switch to a larger or smaller one by spinning down the instance and attaching our separate EBS volume to a new one. 7-ebs-volumes.png]]
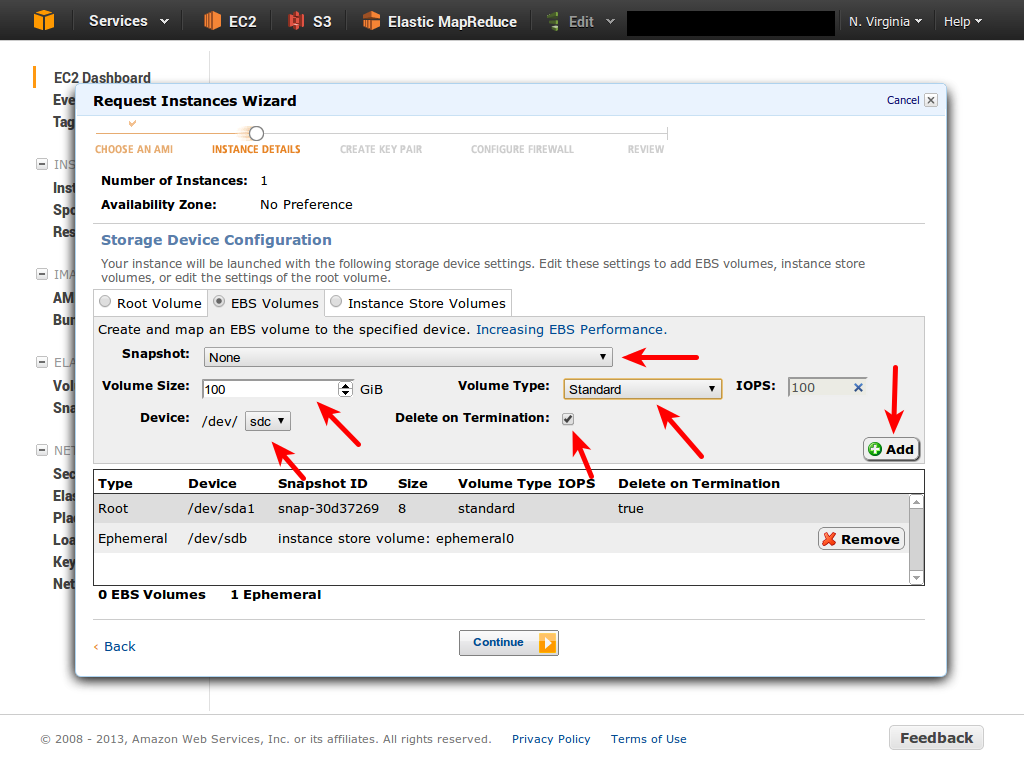
h. We're going to add a new volume here. No need to tweak iops or other settings other than the size. 8-add-volume.png]]
- OK, we have the disks we want. Click Continue.
9-continue.png]]
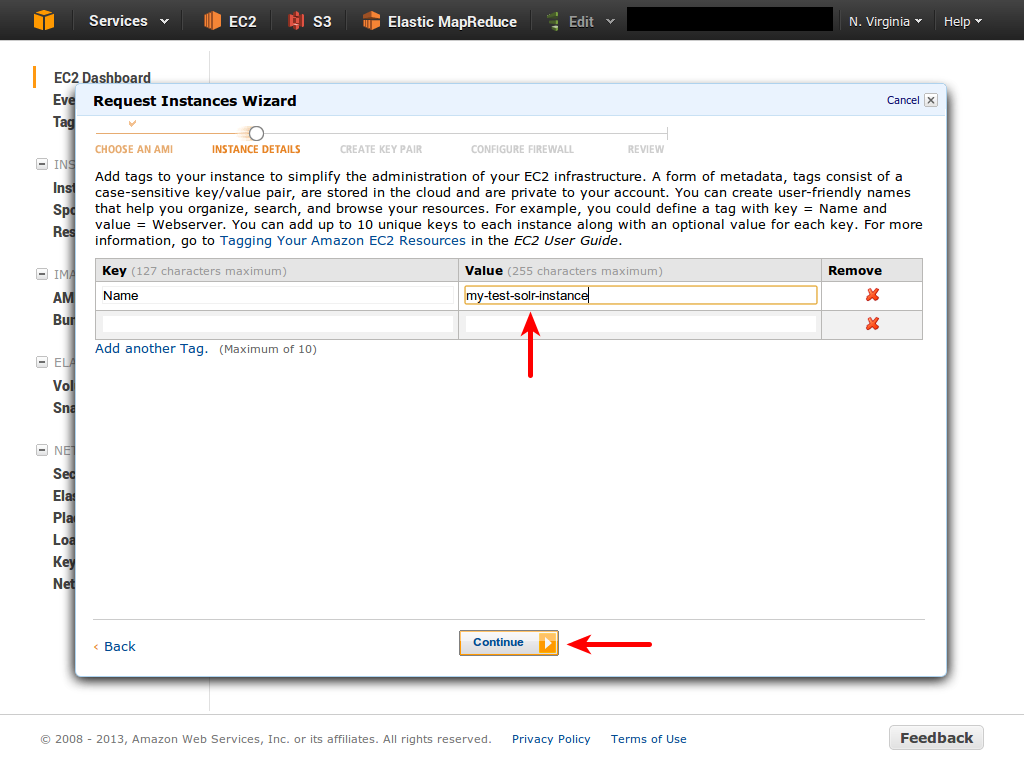
j. Give your instance a name. The one here is just an example. The name will make it easy to find in the AWS Console, but doesn't affect much else. 10-name-instance.png]]
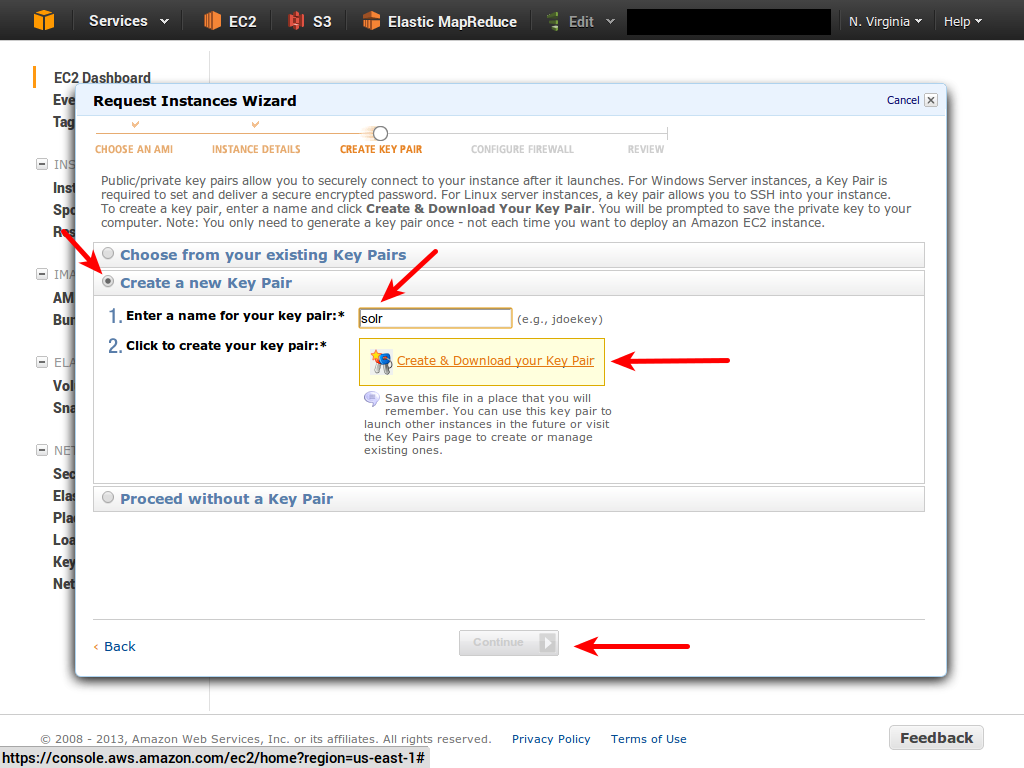
k. We're going to need a keypair to log in to our instance and configure settings. If you have one set up in your account already, you can elect to use that, but here we're creating a new one for the instance. Make sure you download it and save it in a safe place. If you're using Mac OS X or Linux or Unix, a good place to keep it is in the .ssh folder in your home directory. Create it if it doesn't exist already. 11-create-keypair.png]]
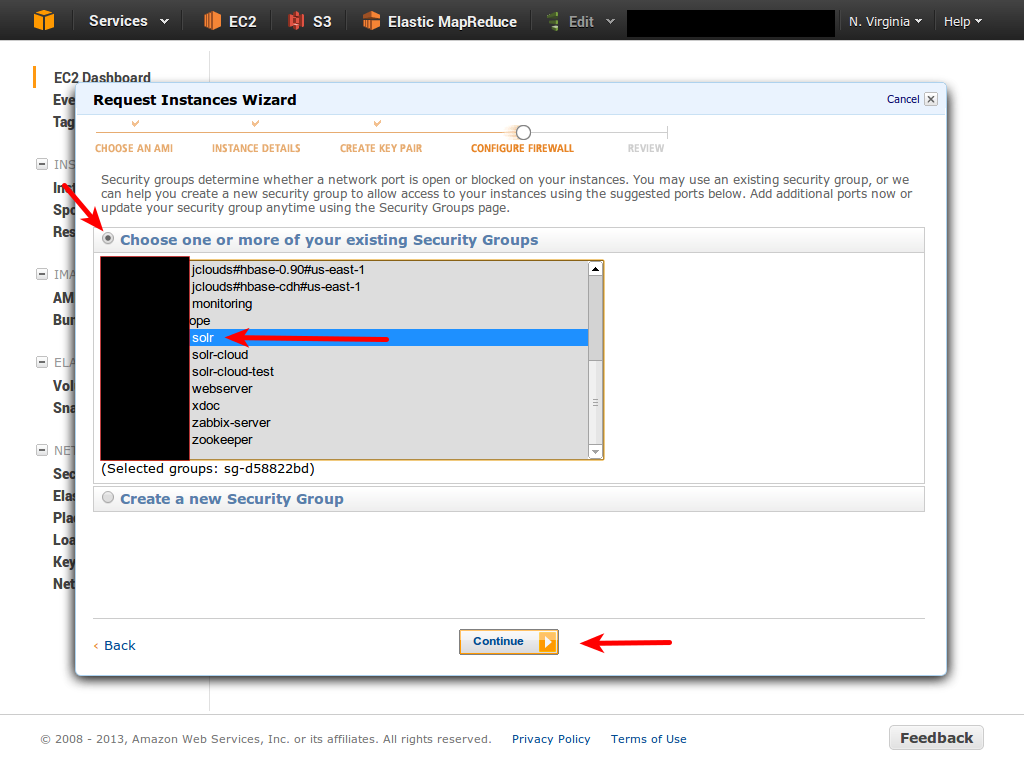
l. Choose the security group we created in step #3. 12-choose-security-group.png]]
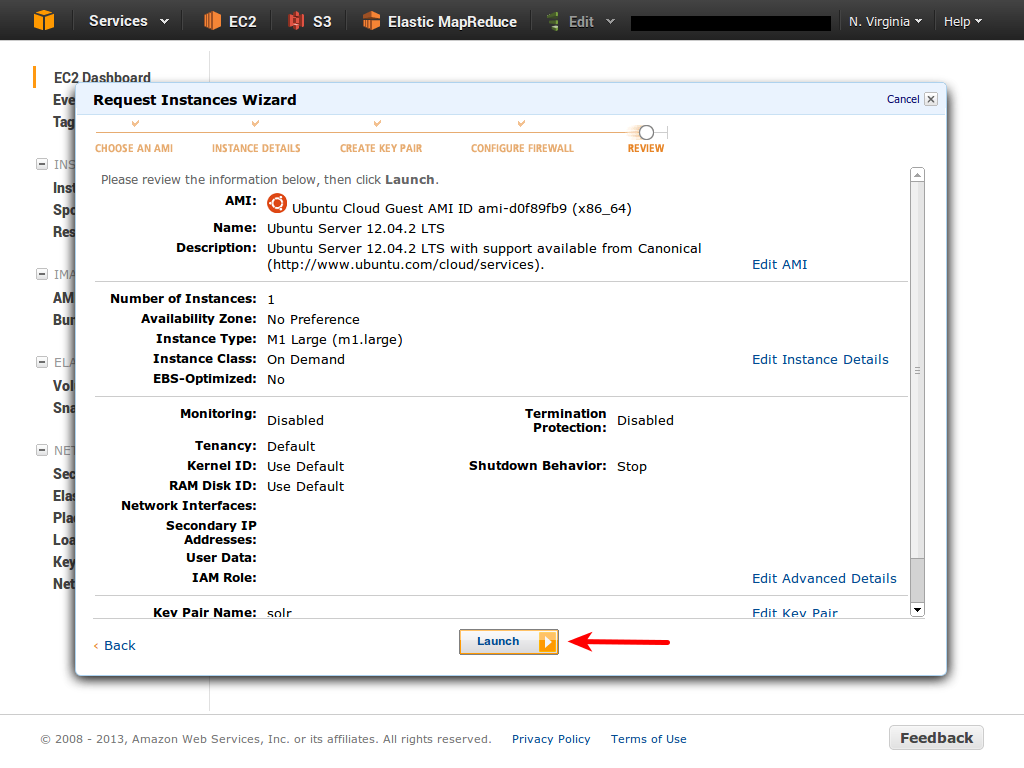
k. OK, looking good. Click Launch! 13-launch.png]]
Log In to Instance
OK, your instance should be coming up now. You can track the progress in the EC2 Console. When the state becomes Running, grab your server key and log in! First, grab the hostname from the detail view of the host. It will look something like ec2-50-18-121-236.compute-1.amazonaws.com. With command line ssh, it looks something like:
ssh -i ~/.ssh/[KEYNAME.pem] ubuntu@[HOSTNAME]
So, for example,
ssh -i ~/.ssh/solr.pem ubuntu@ec2-50-18-121-236.compute-1.amazonaws.com
(This assumes you stored the key in your .ssh folder as previously mentioned.)
Windows users who don't have command line SSH set up can download PuTTY and import the key by following http://blog.linuxacademy.com/linux/connect-to-amazon-ec2-using-putty-private-key-on-windows/
If everything goes well, you should be greeted with a message welcoming you to Ubuntu and displaying some OS statistics. You're in!
EBS Setup
We attached an EBS volume to the host when we created it, but we didn't specify an image to use, so it came blank. That's easy to fix:
sudo apt-get -y install xfsprogs
sudo mkfs.xfs /dev/xvdc
sudo mkdir /ebs
sudo mount /dev/xvdc /ebs
Et voila, our ebs volume is formatted with XFS and is now available at the path /ebs. Notice that you don't need a password to run sudo.
Download Solr
We're going to install Solr right on the volume alongside the index. This will make it easy to migrate instance sizes by simply detaching the ebs volume and attaching to a new instance, or by taking a snapshot and restoring it elsewhere.
cd /ebs
curl -O http://apache.mirrors.lucidnetworks.net/lucene/solr/4.3.0/solr-4.3.0.tgz
tar xf solr-4.3.0.tgz
8. Launch Jetty
9. Index some stuff 10. Dials to tweak