This document describes all the necessary steps in order to set up and maintain the auto scaling environment of the MXNet CI system. Please not that most scripts used on this page are currently private and will only be published at a later point in time. Thus, it's currently not possible reproduce the steps described here.
Overview
TODO: Describe the flow (config files, ami creation, launch template creation, lambda deployment, master deployment, master configuration, master ebs volum etc)
AMI creation
Master
Slave
In order to create a slave base AMI, you can use the script at mxnet_ci_general/infrastructure_slave_creation/create_slave.sh. It will prompt you for a config dir which is available in the same directory. At the time of writing this document, you could choose between the following options:
- conf-ubuntu-cpu-c5
- conf-ubuntu-gpu-g3
- conf-ubuntu-gpu-p3
As soon as you enter one of these directory names, a terraform template launches an instance in your AWS account, it will execute the necessary setup logic and then stop the instance in order to allow you to continue with the launch template creation process. Warning: do not stop the instance manually! Please note that you will need a named AWS CLI profile called 'mxnet-ci-dev' or this operation is going to fail.
Ubuntu
On Ubuntu, no additional steps are necessary after executing the create-slave shell script. Just create an AMI in the EC2 console after the instance has reached the Stopped-state. Warning: do not stop the instance manually as it leaves it in an inconsistent state that will be baked into the launch template.
Windows
On Windows, there is currently no process to set up a slave from scratch and the above shellscript is not applicable.
In order to create an AMI, please launch the program at C:\ProgramData\Amazon\EC2-Windows\Launch\Settings\Ec2LaunchSettings.exe and press 'Shutdown with Sysprep' with the following configuration:

After the instance has been stopped, create an AMI in the EC2 as usual.
Launch template creation
The auto scaling uses EC2 launch templates to retrieve the instance configuration. In order to create or update a launch template, go to https://us-west-2.console.aws.amazon.com/ec2/v2/home?region=us-west-2#LaunchTemplates:sort=launchTemplateId. You will be presented with a screen like this:
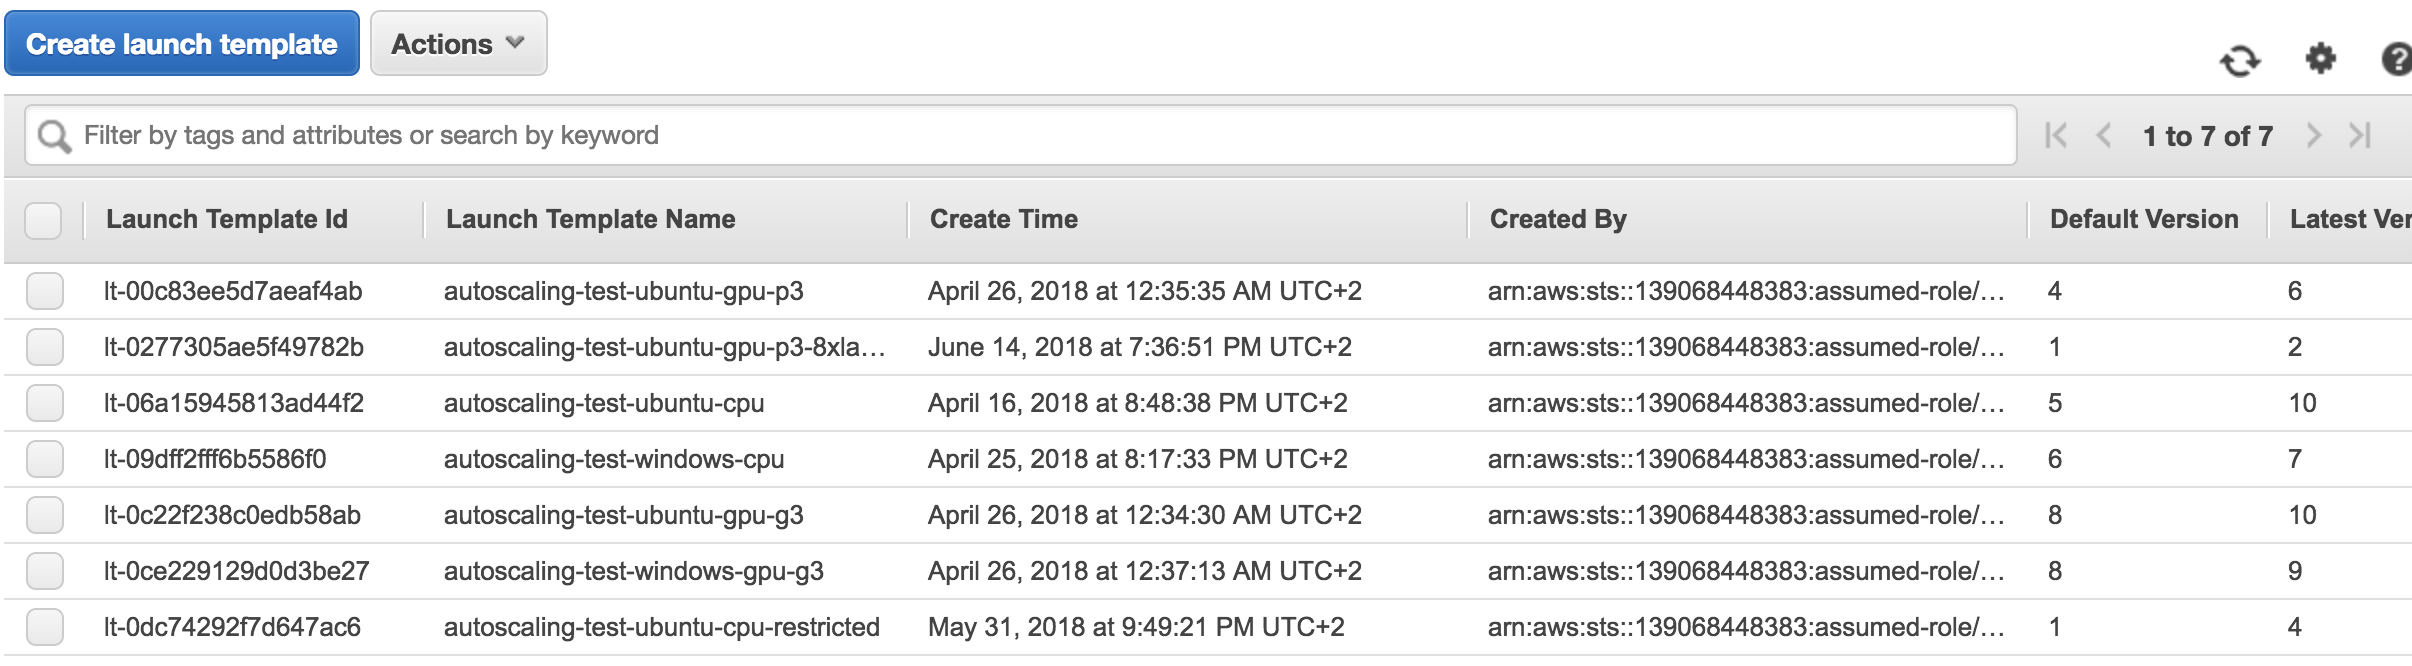
In order to update a launch template, press 'Create launch template'. Make sure to select "Create a new template version", "Launch template name", "Source template" and "Source Template version":

Every slave type needs a different configuration which is outlined below:
After creating the launch templates, please make sure to update the auto scaling lambda configuration with the corrent launch template IDs and versions.
Secrets Manager
In order to avoid having any secrets in the sourcecode, we're making use of AWS Secrets Manager. The secrets are safely stored in that service and retrieved during runtime using IAM Roles.
IAM Policy
To grant access to your secrets, please create the following IAM policy and attach it to the appropriate roles or instance profiles. Please don't forget to fill in the ARNs of the freshly created secrets.
Jenkins credentials
This secret contains credentials allowing to authenticate against the target Jenkins master. The name of the secret could be along the lines of {DEPLOY_STATE}/AutoScaling/Jenkins_Credentials. The following Key-Value-Pairs are expected:
github_username: GitHub account name
github_token: Token associated to GitHub account. Can be retrived at http://jenkins.mxnet-ci-dev.amazon-ml.com/user/USERNAME/configure by clicking on 'Show API Token...'

jenkins_url: Public URL of the target Jenkins master, e.g. http://jenkins.mxnet-ci-dev.amazon-ml.com
jenkins_priv_url: Private URL of the target Jenkins master, e.g. http://jenkins-priv.mxnet-ci-dev.amazon-ml.com
No manual IAM policy is required for this secret. Please only fill in the details in the environment.yml of the auto scaling handler at https://github.com/MXNetEdge/mxnet_ci_general/blob/master/autoscaling/lambda_mxnet_ci/autoscaling/environment.yml (private repository).
Docker Hub CI-Cache credentials
This secret contains credentials allowing to publish Docker images to Docker Hub. This account is used for the distributed Docker cache and not intended for the distribution of end-user facing images. The name of the secret could be along the lines of {DEPLOY_STATE}/DockerCache/DockerHubCredentials. The following Key-Value-Pairs are expected:
username: Docker Hub usernamepassword: Docker Hub password
It is recommended to create an organization and have a separate bot account. Please make sure to only attach this IAM policy to a restricted instance profile.
Docker cache
In order to manage a distributed Docker cache, we're leveraging Docker Hub.
Cache creation
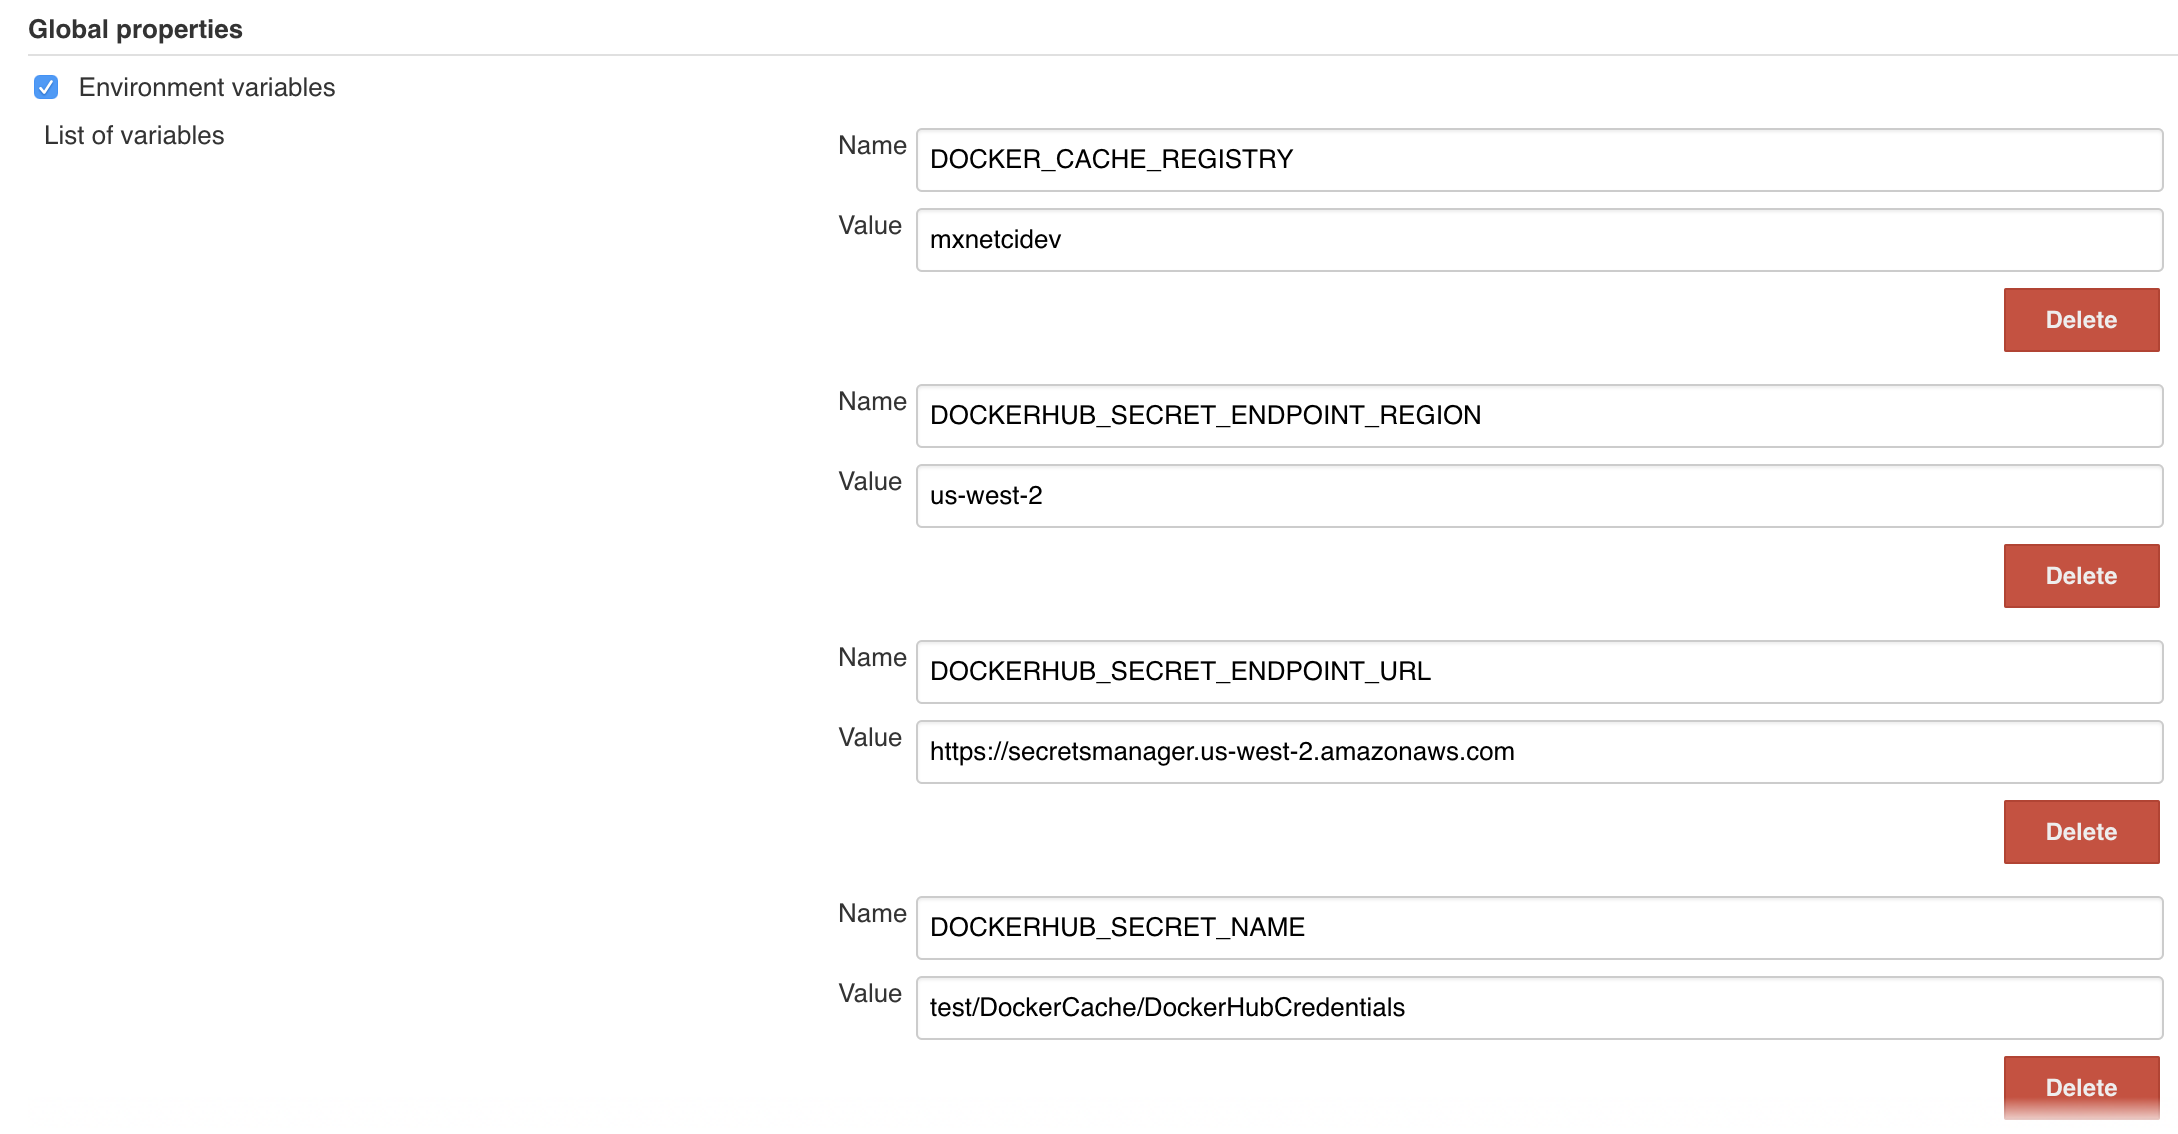
To generate the cache, we're leveraging a Jenkins job that rebuilds the cache upon new commits to the master. To define which bucket to be used for cache publish and retrieval, set the following environment variable at Jenkins -> Manage Jenkins -> Configure System -> Global properties -> Environment variables. Create variables as follows and insert the variables from the secret created above:
Auto scaling
Auto scaling is done by a lambda function. The management of this function is done using the serverless framework.
Mac install
brew install node@8
brew install npm
export PATH="/usr/local/opt/node@8/bin:$PATH"
npm install serverless
export PATH="~/node_modules/.bin/:$PATH"
Installation
Installation is done using the following command:
sls plugin install -n serverless-python-requirements --stage test
Deployment
Configure credentials as:
aws configure --profile mxnet-ci-dev
Deployment is done using the script at autoscaling/lambda_mxnet_ci/autoscaling/deploy-lambda.sh. Please make sure to set up the AWS-CLI profiles with the following names beforehand.
- test --> mxnet-ci-dev
- prod --> mxnet-ci
In OSX I had to apply this fix to be able to deploy: https://stackoverflow.com/questions/24257803/distutilsoptionerror-must-supply-either-home-or-prefix-exec-prefix-not-both
Jenkins user
In order to allow our lambda function to control the Jenkins slaves, we need a user with credentials and permissions. Before continuing, please log in using the regular GitHub credentials in order to make the system aware of that new user. To set up these permissions, navigate to Jenkins->Manage and Assign Roles->Manage Roles. Create a role with the name 'autoscaling' and assign the following permissions:
After creating the role, assign this role to the user created above by going to Jenkins->Manage and Assign Roles->Assign Roles. Enter the GitHub handle at 'User/group to add' and press 'Add'. Attention: This name is case-sensitive! Afterwards, assign it the autoscaling role.
2 Comments
Pedro Larroy
Make sure to export AWS_ACCESS_KEY_ID and AWS_SECRET_ACCESS_KEY because serverless don't respect AWS_DEFAULT_PROFILE
Pedro Larroy
Force redeploy ```sls deploy -s test --force --verbose```